
Lab assignment: getting to know the tools and equipment
- Split into pairs.
- Each pair will have two desktop computers and one PLC at the workstation. In future exercises, you will also select one of the teaching models (pneumatic system, line with two devices, or robotic arm).
- Each PLC has a specific IP address. It is recommended that you always use the same PLC.
- The right-sided computer (as you are facing the whiteboard) at each desk in the PR17 lab room is set up with a production environment, so it should be connected to the classroom network. From the network socket, unplug the cable from the left computer and connect it to the PLC.
- Log in to the right computer (Linux).
- Open a Terminal window and run the following command:
/mnt/D/skupno/PA/setup_PA.sh - Start the virtual machine using VirtualBox (you can find the VM in
mnt/D/PA-VM-student@domain). - Create your first project according to the provided instructions. Then return here.
- Start by learning the basics of ladder diagram programming. Solve the following warm-up tasks:
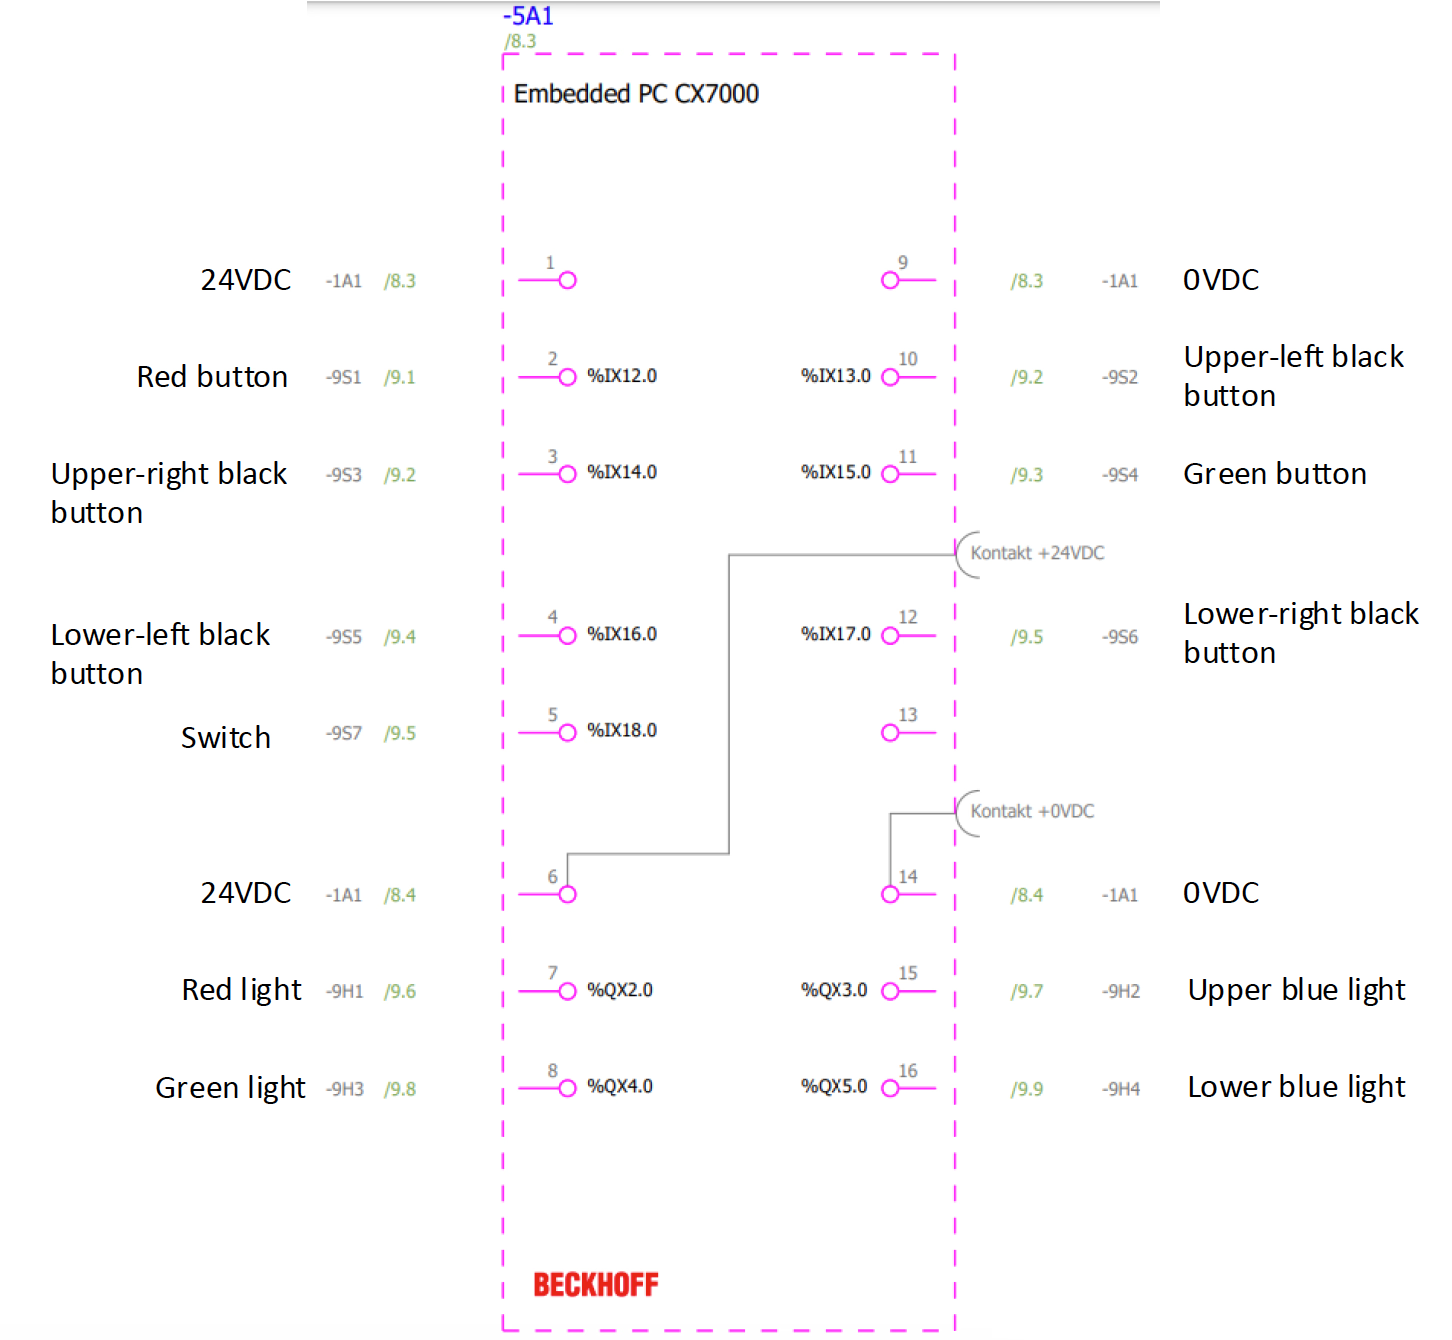
- Task 1: When the toggle switch (from vertical to slanted position) is flipped, the red light should turn on.
- Task 2: Implement the simple logical function – exclusive OR (XOR) – over the two black buttons. The output of the function should be a green light.
- Connect your global variables with the PLC's inputs and outputs using the following configuration schematic:
- Save the project and archive it for use in future exercises: File → Save Project As Archive... → the result is a compressed file with the extension
tnzip, which is really just a regular compressed zip file. - Send the project to yourself from the VM (this step is essential for ensuring your work will be saved).